


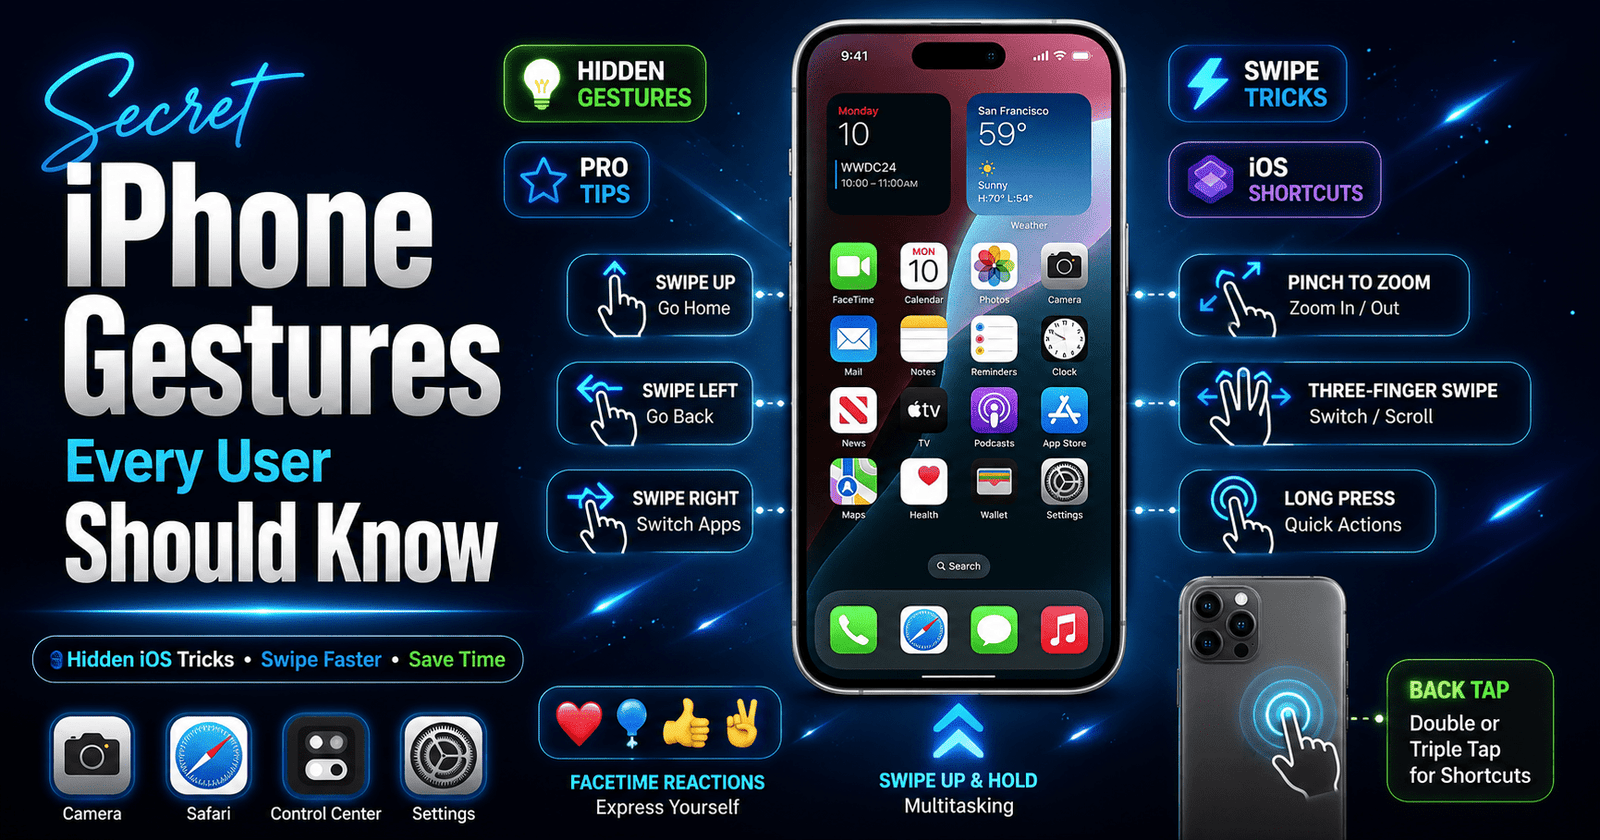
Did you know that most iPhone users only use about 20% of the available iPhone gestures? While millions rely on basic taps and swipes every day, iOS is packed with hidden iPhone gestures that can help you navigate faster, edit text like a pro, capture screenshots in seconds, and unlock powerful productivity features.
Whether you’re using iOS 17, iOS 18, or a recent iPhone model, mastering these swipe gestures and iOS shortcuts can completely change the way you interact with your device.
From secret navigation tricks and FaceTime hand reactions to camera shortcuts and advanced text-editing gestures, there’s much more to your iPhone than meets the eye.
In this complete iPhone gestures guide, you’ll discover the most useful hidden tricks, learn how to customize gesture settings, fix common gesture issues, and explore the complete list of gestures that every iPhone user should know to save time and get more done every day.
What Are iPhone Gestures?
What is iPhone gestures? Simply put, iPhone gestures are touch-based commands that allow users to control and navigate their device without relying on physical buttons.
Understanding how to use gestures on iPhone can make your device faster, smarter, and easier to use every day. This iPhone gestures guide covers the most important iPhone swipe gestures and touch controls available on modern iPhones.
The most common touch gestures include a Tap to open apps, a Swipe to move between screens or go back, and a Long Press to access quick actions and hidden menus.
iPhone also supports Multi-touch gestures, allowing you to use two or more fingers for actions like Pinch to zoom out and Zoom in on photos, web pages, and maps. Mastering these simple gestures helps you navigate iOS efficiently and unlock powerful features built into your iPhone.
Essential Navigation Gestures Every iPhone User Should Know
Mastering Essential Navigation Gestures is the fastest way to use your iPhone more efficiently.
Apple’s iPhone gestures navigation system replaces physical buttons with intuitive swipe gestures, making it easier to switch apps, return to the Home Screen, and access important features with just a few finger movements.
Whether you’re new to iPhone or upgrading from an older model, these iPhone swipe gestures will help you navigate iOS like a pro.
Swipe Up to Go Home
From any app, swipe up from the bottom edge of the screen to instantly return to the Home Screen. This is one of the most frequently used iPhone gestures.
Swipe Up and Hold for App Switcher
Swipe up from the bottom and pause in the middle of the screen to open the App Switcher. Here, you can quickly switch between recently used apps or close apps by swiping them upward.
Swipe Between Open Apps
To move between recently opened apps, swipe left or right along the bottom edge of the screen. This gesture is much faster than opening the App Switcher every time.
Back Gesture
The iPhone gestures back feature lets you return to the previous screen by swiping from the left edge toward the center of the display. It works in most Apple apps and many third-party apps, making one-handed navigation much easier.
Reachability Gesture
If you’re using a larger iPhone, swipe down on the bottom edge (or the Home indicator) to activate Reachability. This temporarily lowers the top portion of the screen, allowing you to comfortably access buttons and menus with one hand.
Open Control Center
On Face ID models, swipe down from the top-right corner to open Control Center. From here, you can quickly adjust brightness, Wi-Fi, Bluetooth, Focus mode, flashlight, screen recording, and other settings.
Open Notification Center
Swipe down from the top-left side (or near the top center) of the screen to view your notifications, alerts, reminders, and widgets without unlocking additional menus.
Spotlight Search
Swipe downward from the middle of the Home Screen to open Spotlight Search. Use it to quickly find apps, contacts, emails, documents, photos, settings, and even perform web searches without opening Safari.
Learning these essential iPhone swipe gestures will make everyday navigation faster, smoother, and more intuitive, helping you get the most out of your iPhone with minimal effort.
Secret Swipe Gestures That Save Time
If you want to use your iPhone like a power user, these hidden iPhone gestures are worth learning. Apple has built dozens of smart swipe gestures and iOS shortcuts into iOS that make editing text, organizing photos, and multitasking much faster. Many of these features are hidden in plain sight, so even long-time iPhone users often overlook them.
Undo with Three Fingers
Made a typing mistake? Swipe left with three fingers anywhere on the screen to instantly undo your last action. You can also double-tap with three fingers to undo in supported apps.
Redo Gesture
Accidentally undid something? Swipe right with three fingers to redo the last action. This gesture is especially useful when editing documents, notes, or emails.
Copy with Three Fingers
Select text, images, or other content, then pinch inward with three fingers to copy it to the clipboard. It’s one of the fastest iOS shortcuts for copying content.
Paste Gesture
After copying content, pinch outward with three fingers to paste it into a document, message, or email without opening the edit menu.
Cut Gesture
Select the desired text and perform a quick double pinch inward with three fingers to cut it. This hidden gesture speeds up text editing across many Apple apps.
Drag and Drop Photos
Touch and hold a photo until it lifts, then drag it with your finger into another album, app, or conversation. You can even use another finger to open a different app while holding the photo.
Multi-select Photos
In the Photos app, tap Select, then swipe your finger across multiple images to select several photos at once. This makes deleting, sharing, or organizing large photo collections much quicker.
Swipe Between Safari Tabs
Open Safari and swipe left or right across the address bar or the bottom tab bar to instantly switch between open tabs without opening the tab overview.
Swipe Keyboard Cursor
Press and hold the Space bar until the keyboard turns into a trackpad. Slide your finger to move the text cursor precisely, making it much easier to edit long paragraphs or fix typing mistakes.
These hidden iPhone gestures, swipe gestures, and built-in iOS shortcuts can save you valuable time every day. Once they become part of your routine, you’ll navigate, edit, and multitask on your iPhone much faster than relying on traditional menus and buttons.
Complete Text Editing Gestures
Whether you’re writing emails, editing documents, or taking notes, Apple’s Text Editing & Selection gestures make typing faster and more accurate. These built-in shortcuts eliminate the need for extra taps and menus, helping you edit text with ease. If you’re looking for a complete iPhone gestures list or want to copy all iPhone gestures list, these text-editing gestures are among the most useful to master.
Select a Word
Double-tap any word to highlight it instantly. You can then drag the selection handles to include more or fewer words.
Select a Paragraph
Triple-tap within a paragraph to select the entire paragraph. This is useful when copying, cutting, or formatting large blocks of text.
Cursor Control
Press and hold the Space bar until the keyboard transforms into a virtual trackpad. Slide your finger to move the cursor precisely anywhere within the text, making corrections much easier.
Copy
After selecting text, pinch inward with three fingers to copy it to the clipboard. Alternatively, use the Copy option from the pop-up editing menu.
Paste
Paste copied content by pinching outward with three fingers or tapping Paste from the contextual menu.
Undo Typing
Swipe left with three fingers or double-tap with three fingers to undo your last typing action. This gesture works across most Apple apps.
Redo Typing
Swipe right with three fingers to restore the text or action you previously undid, allowing you to quickly recover edits without retyping.
Learning these text-editing gestures will significantly improve your productivity and help you edit content like a pro. They’re an essential part of any complete iPhone gestures list and are useful for students, professionals, and everyday iPhone users alike.
Screenshot & Camera Gestures
Your iPhone includes several built-in iPhone gestures screenshot and iPhone camera gestures that make capturing photos, screenshots, and videos faster than ever. From quick screen captures to advanced camera controls, these gestures help you save time while creating high-quality content.
Take Screenshot
On Face ID iPhones, press the Side Button and Volume Up button simultaneously to capture a screenshot. A thumbnail preview appears in the lower-left corner for quick editing or sharing.
Markup Screenshot
Tap the screenshot preview immediately after capturing it to access Markup tools. You can crop, draw, highlight, add text, sign documents, or annotate images before saving or sharing.
Swipe to Share
After taking a screenshot, touch and hold the thumbnail, then swipe to quickly access the Share Sheet. This allows you to send screenshots via Messages, Mail, AirDrop, or social media without first saving them.
Camera Quick Launch
Open the Camera instantly by swiping left from the Lock Screen or tapping the Camera icon. This gesture helps you capture spontaneous moments without unlocking your iPhone.
Zoom Gesture
Use two fingers to pinch outward for zooming in or pinch inward for zooming out while taking photos or videos. You can also drag the zoom control for smoother adjustments.
Burst Photos
In Photo mode, press and drag the shutter button toward the left (or downward in landscape orientation) to capture a burst of continuous photos—ideal for sports, pets, or fast-moving subjects.
Quick Video Recording
While in Photo mode, press and hold the shutter button to begin recording a QuickTake video. Slide your finger to the lock icon if you want to continue recording hands-free.
Hand Gesture Camera Tricks
Many third-party camera apps and compatible accessories support hand-gesture controls, allowing you to trigger the shutter remotely. If you’re wondering how to take picture with hand gestures iPhone, Apple’s built-in Camera app doesn’t currently support universal hand-gesture photo capture, but gesture-based controls may be available through supported apps, accessibility features, or external camera accessories.
These iPhone camera gestures and screenshot shortcuts help you capture, edit, and share photos more efficiently, making them valuable skills for every iPhone user.
Secret FaceTime Hand Gestures
Apple introduced fun and interactive iPhone FaceTime gestures that automatically trigger animated effects during video calls. These iPhone hand gestures use the front-facing camera to recognize specific hand signs and display visual reactions, making conversations more engaging. Available on supported iPhones running recent versions of iOS, these iPhone reactions gestures also work in many third-party video conferencing apps that support Apple’s Reaction effects. If you’re looking to impress friends or make virtual meetings more expressive, these iPhone FaceTime hand gestures are worth trying.
Thumbs Up 👍
Give a thumbs-up (👍) with one hand to display a floating Thumbs Up reaction( 👍) on the screen. It’s a quick way to show approval without interrupting the conversation.
Heart(❤️)
Form a heart shape with both hands(❤️) in front of the camera to trigger a large animated heart. This popular iPhone gestures heart reaction is perfect for celebrating special moments with family and friends.
Balloons(🎈)
Show two thumbs up to activate colorful balloons(🎈) that float across the screen. The iPhone gestures balloons(🎈) effect is commonly used during birthdays, celebrations, and congratulatory video calls.
Confetti(🎉)
Raise two peace signs (✌️✌️) with both hands to release a shower of confetti(🎉), adding a festive touch to your FaceTime conversation.
Fireworks(🔥)
Display two thumbs down to trigger a dramatic fireworks animation(🔥) behind you. Despite the gesture, many users activate this effect simply for fun during calls.
Rain(🌧)
Show one thumbs down to create a rainy weather animation(🌧) on your screen, expressing disappointment or reacting humorously during a conversation.
Rock(🤟)
Make the rock-on (🤟) hand sign to unleash colorful laser beams across the display, creating one of the most eye-catching FaceTime reaction effects.
Where Do These Video Call Gestures Work?
These iPhone video call gestures work automatically in FaceTime on supported devices and are also available in compatible third-party apps such as Zoom, Microsoft Teams, and other video conferencing apps that support Apple’s Reaction effects.
While many users search for iPhone video call gestures or iPhone FaceTime hand gestures, it’s important to note that these reactions are system-level features rather than app-specific settings.
How to Enable FaceTime Hand Gestures
If the reactions don’t appear:
- Make sure your iPhone is updated to the latest version of iOS.
- Use a supported iPhone model with the front-facing camera.
- Open FaceTime or a compatible video calling app.
- During the call, open Control Center, tap Video Effects, and ensure Reactions is turned on.
- Keep your hand gesture clearly visible in front of the camera for a moment until the animation appears.
These iPhone FaceTime gestures make video calls more interactive, entertaining, and expressive. Whether you’re triggering iPhone gestures heart, iPhone gestures balloons, or other animated reactions, these hidden features add personality to every video conversation.
WhatsApp iPhone Gestures
WhatsApp includes several built-in iPhone gestures WhatsApp users can take advantage of to manage chats, reply faster, and navigate the app more efficiently. These WhatsApp iPhone gestures combine Apple’s intuitive swipe controls with WhatsApp’s own shortcuts, helping you save time while messaging, making voice calls, sharing photos, or joining video calls. Whether you’re a casual user or a power user, mastering these gestures can significantly improve your WhatsApp experience.
Swipe to Reply
In any individual or group chat, swipe right on a message to instantly reply to it. This gesture automatically quotes the selected message, making conversations easier to follow without manually selecting the Reply option.
Archive Chats
On the main Chats screen, swipe left on any conversation to reveal the Archive option. Archiving removes chats from your main inbox while preserving all messages and media, helping keep your chat list organized.
Pin Chats
Swipe right on a chat (or long-press, depending on your WhatsApp version) and select Pin to keep important conversations at the top of your chat list. You can pin family, work, or frequently contacted chats for quick access.
Mark as Read
Swipe left on an unread conversation to reveal Mark as Read. This lets you clear unread notifications without opening the chat, which is useful when you’re short on time.
Voice Message Gestures
Touch and hold the microphone icon to record a voice message. Slide your finger upward to lock recording for hands-free use, or slide left before releasing to cancel the recording instantly. These simple gestures make recording voice notes faster and more convenient.
Video Call Gestures
During iPhone video call gestures on WhatsApp, use familiar iPhone controls such as pinch-to-zoom (when supported), tap to focus the camera, and swipe to access system notifications or Control Center without ending the call.
On compatible iPhones, Apple’s built-in Reaction effects can also be available during WhatsApp video calls when enabled through Control Center > Video Effects > Reactions, allowing hand gestures such as 👍 or ❤️ to trigger on-screen animations.
Camera Gestures
Within WhatsApp Camera, pinch with two fingers to zoom in or out while capturing photos or recording videos.
Tap anywhere on the screen to adjust focus and exposure, and swipe between Photo and Video modes for quicker shooting.
These camera gestures help you capture better content directly inside WhatsApp without opening the Camera app.
By learning these WhatsApp iPhone gestures, you’ll reply to messages faster, organize chats more efficiently, record voice notes with ease, and enjoy smoother video calls. These hidden shortcuts are simple to use but can make a noticeable difference in your everyday WhatsApp experience.
Safari iPhone Gestures
Safari includes several intuitive Safari iPhone gestures that make browsing the web faster and more convenient.
Instead of tapping buttons repeatedly, you can use simple swipe and touch gestures to navigate between pages, manage tabs, refresh websites, and enjoy distraction-free reading.
Whether you’re researching online, shopping, or reading articles, these built-in gestures help you browse more efficiently on your iPhone.
Swipe Back
To return to the previous webpage, simply swipe right from the left edge of the screen. This gesture works on most websites and is one of the quickest ways to navigate your browsing history without tapping the Back button.
Swipe Forward
If you’ve gone back to a previous page, swipe left from the right edge of the screen (or use the Forward button when available) to move forward to the next page in your browsing history.
Close Tabs
To close an open tab, open the Tab View by tapping the Tabs icon, then swipe left on any tab to close it instantly. You can also touch and hold the Tabs button to access shortcuts for closing the current tab or all tabs at once.
Switch Tabs
Quickly move between open Safari tabs by swiping left or right across the address bar or the bottom tab bar (depending on your Safari layout).
This gesture is much faster than opening the full tab overview when switching between multiple websites.
Pull to Refresh
When viewing a webpage, drag downward from the top of the page until you see the refresh indicator, then release to reload the website.
This gesture is useful for checking the latest news, refreshing social media feeds, or updating search results.
Reader Mode
For a clean, distraction-free reading experience, tap the Reader button (when available) in the address bar.
Reader Mode removes advertisements, pop-ups, and unnecessary page elements, leaving only the article text and images.
You can also customize the font style, text size, and background color for more comfortable reading.
Mastering these Safari iPhone gestures helps you browse faster, switch between tabs effortlessly, refresh pages with a simple swipe, and enjoy a cleaner reading experience.
These small shortcuts can save time every day and make Safari much easier to use on any modern iPhone.
Accessibility & VoiceOver Gestures
Apple designs iPhone with powerful accessibility features to make the device easier for everyone to use, including people with visual, hearing, or motor impairments.
One of the most useful accessibility tools is VoiceOver, Apple’s built-in screen reader that lets users navigate their iPhone using touch gestures and spoken feedback.
Learning these VoiceOver iPhone gestures can improve accessibility and help users operate their devices more efficiently.
Two-Finger Swipe
A two-finger swipe is one of the most commonly used VoiceOver gestures. Depending on the app and direction, it can:
- Swipe down to Read All from the current position.
- Swipe up to read from the top of the screen.
- Answer or end a phone call.
- Start or stop media playback in supported apps.
Three-Finger Swipe
Three-finger gestures are primarily used for scrolling and navigation:
- Swipe up or down to scroll through pages, lists, or long documents.
- Swipe left or right to move between pages on the Home Screen or in supported apps.
- Double-tap with three fingers to toggle speech on or off in certain VoiceOver modes.
Four-Finger Gestures
Four-finger gestures provide quick navigation across the screen:
- Tap near the top to jump to the first item on the screen.
- Tap near the bottom to move to the last item.
- Swipe left or right to move between app containers or sections, depending on the app.
- Quickly access interface elements without manually exploring the entire screen.
VoiceOver Shortcuts
VoiceOver includes several shortcuts that make navigation faster:
- Double-tap anywhere on the screen to activate the selected item.
- Double-tap and hold to perform a long press or drag action.
- Rotate two fingers on the screen to open the Rotor, allowing you to change navigation modes such as headings, links, words, or characters.
- Triple-click the Side Button (if configured) to quickly turn VoiceOver on or off.
How to Turn Off VoiceOver Gestures on iPhone
If you’re searching for how to turn off VoiceOver gestures on iPhone, follow these steps:
- Open Settings.
- Tap Accessibility.
- Select VoiceOver.
- Toggle VoiceOver off.
If VoiceOver is already enabled, remember that you’ll need to double-tap instead of a single tap to select items and use three fingers to scroll through menus.
How to Turn Off Voice Gestures on iPhone
Many users search for how to turn off voice gestures on iPhone, but this usually refers to VoiceOver or Voice Control. To disable Voice Control:
- Go to Settings > Accessibility.
- Tap Voice Control.
- Turn Voice Control off.
If your iPhone is responding unexpectedly to touch or voice commands, check both VoiceOver and Voice Control settings to ensure only the accessibility features you need are enabled.
By understanding these VoiceOver iPhone gestures and accessibility shortcuts, you can navigate your iPhone more efficiently and customize it to better suit your needs, whether you’re using accessibility features daily or simply exploring Apple’s advanced navigation tools.
Customize iPhone Gestures
Apple lets you personalize how your iPhone responds to touch through iPhone gestures settings and Accessibility features. While the core navigation gestures can’t be completely remapped, you can customize many gesture-related options to make your iPhone easier and faster to use. Whether you want to enable additional controls, create shortcuts, or improve one-handed navigation, these iPhone gestures custom settings offer plenty of flexibility.
How to Turn On iPhone Gestures
Most navigation gestures are enabled by default on Face ID iPhones. To enable additional gesture-based features:
- Open Settings.
- Tap Accessibility.
- Choose the feature you want to enable, such as AssistiveTouch, Back Tap, or Voice Control.
- Turn the feature on and customize it to your preferences.
If you’ve switched from a Home Button iPhone to a newer model, these gestures become available automatically.
How to Turn Off iPhone Gestures
Core system navigation gestures, such as swiping up to go Home or swiping back, cannot be completely disabled. However, you can turn off optional gesture features:
- Go to Settings > Accessibility.
- Disable AssistiveTouch, Back Tap, Voice Control, or VoiceOver if you no longer need them.
- Adjust other accessibility options that affect gesture behavior.
Many users searching for how to turn off iPhone gestures are actually looking to disable these optional accessibility gestures rather than the built-in navigation system.
How to Change Gesture Settings
To modify your iPhone swipe gestures settings:
- Open Settings.
- Tap Accessibility.
- Select the feature you want to customize.
- Adjust gesture sensitivity, touch duration, or shortcut actions where available.
You can also customize touch-related settings such as Touch Accommodations, Haptic Touch, and Reachability for a more comfortable experience.
Customize with AssistiveTouch
AssistiveTouch creates a floating on-screen button that gives quick access to common actions and custom gestures. It is especially useful if you have difficulty performing standard swipe gestures or want one-tap access to frequently used features.
With AssistiveTouch, you can:
- Create custom touch gestures.
- Access Home, App Switcher, Siri, and Control Center.
- Lock the screen or adjust volume.
- Perform multi-finger gestures with a single touch.
Enable it by going to Settings > Accessibility > Touch > AssistiveTouch.
Use Back Tap Shortcuts
Back Tap is one of Apple’s most useful hidden features. It lets you perform actions by tapping the back of your iPhone two or three times.
You can assign actions such as:
- Take a screenshot.
- Open the Camera.
- Launch Control Center.
- Turn on the flashlight.
- Activate Siri.
- Run a Shortcut.
- Open an app.
To enable it:
- Go to Settings > Accessibility > Touch > Back Tap.
- Choose Double Tap or Triple Tap.
- Select the action you want to perform.
Set Up Accessibility Shortcuts
Accessibility Shortcuts provide instant access to features like VoiceOver, Zoom, Magnifier, Guided Access, and AssistiveTouch.
To configure them:
- Open Settings.
- Go to Accessibility.
- Tap Accessibility Shortcut at the bottom of the screen.
- Select one or more accessibility features.
- Triple-click the Side Button to quickly enable or disable them.
How to Set iPhone Gestures for Your Needs
If you’re wondering how to set iPhone gestures or how to change iPhone gestures, the best approach is to customize the available accessibility features rather than the core navigation system. By using AssistiveTouch, Back Tap, and personalized iPhone gestures settings, you can create a more efficient and comfortable iPhone experience tailored to your daily workflow.
These customization options allow you to get the most from your iPhone swipe gestures settings, making everyday tasks faster, more accessible, and easier to perform.
iPhone Gestures Not Working? (Easy Fixes)
If your iPhone gestures not working properly, don’t panic. Unresponsive swipes, delayed taps, or gestures that suddenly stop working are usually caused by software glitches, screen issues, or incorrect settings—not hardware failure. Before visiting an Apple Store, try these simple troubleshooting steps to restore normal gesture functionality.
1. Restart Your iPhone
A simple restart can fix temporary software glitches affecting gesture recognition.
How to restart:
- Press and hold the Side button and either Volume button.
- Drag the Power Off slider.
- Wait 30 seconds, then turn your iPhone back on.
Test your swipe and touch gestures after the restart.
2. Remove Your Screen Protector
A thick, damaged, or poorly installed screen protector can interfere with touch sensitivity.
Try:
- Removing the screen protector temporarily.
- Cleaning the display before applying a new, high-quality protector.
- Ensuring there are no air bubbles or cracks affecting touch input.
3. Update iOS
Apple frequently releases software updates that fix touch-screen bugs and improve system stability.
To update your iPhone:
- Open Settings.
- Tap General.
- Select Software Update.
- Install any available iOS update.
Keeping your iPhone updated helps ensure gestures work correctly with the latest features and security improvements.
4. Disable Accessibility Features
Certain accessibility settings may change how gestures behave.
Check these features:
- VoiceOver
- AssistiveTouch
- Voice Control
- Switch Control
- Touch Accommodations
To review them:
- Go to Settings > Accessibility.
- Turn off any feature you aren’t actively using.
- Test your gestures again.
5. Reset All Settings
If gestures still aren’t responding, resetting your settings can resolve configuration conflicts without deleting your personal data.
To reset:
- Open Settings.
- Tap General.
- Select Transfer or Reset iPhone.
- Tap Reset.
- Choose Reset All Settings.
This resets system settings like Wi-Fi, Bluetooth, keyboard preferences, and accessibility options while keeping your photos, apps, and files intact.
6. Clean the Screen
Dirt, grease, moisture, or dust can reduce touchscreen responsiveness.
For best results:
- Turn off your iPhone.
- Wipe the display gently with a soft microfiber cloth.
- Avoid harsh chemicals or abrasive cleaners.
- Make sure your hands are clean and dry before using the screen.
7. Force Restart Your iPhone
If the display freezes or gestures stop responding completely, perform a force restart.
For iPhone 8 and newer:
- Quickly press and release Volume Up.
- Quickly press and release Volume Down.
- Press and hold the Side button until the Apple logo appears.
This doesn’t erase your data and often fixes temporary system freezes.
Additional Tips
If your iPhone gestures not working problem continues after trying these fixes:
- Make sure your display isn’t physically damaged.
- Check whether the issue occurs in one app or across the entire system.
- Free up storage if your iPhone is nearly full.
- Contact Apple Support or visit an Apple Authorized Service Provider if the touchscreen remains unresponsive, as the issue may be hardware-related.
In most cases, these troubleshooting steps resolve gesture-related problems quickly and restore smooth navigation on your iPhone.
Android Navigation Buttons vs iPhone Gestures
One of the biggest differences between Android and iPhone is how you navigate your device. While many Android phones still offer traditional navigation buttons (or let users choose between buttons and gestures), modern iPhones rely entirely on a gesture-based navigation system. If you’re switching from Android to iPhone, understanding the differences can help you adapt more quickly.
Although both systems let you perform common tasks like going Home, going Back, and switching between apps, iPhone gestures generally provide a cleaner, more immersive experience by maximizing screen space. Android, on the other hand, offers greater flexibility by allowing users to choose between navigation buttons and gesture navigation on many devices.
Android Navigation Buttons vs iPhone Gestures Comparison
| Feature | Android Navigation Buttons | iPhone Gestures |
|---|---|---|
| Home | Tap the Home button to return to the Home Screen. | Swipe up from the bottom edge to instantly return Home. |
| Back | Dedicated Back button works across the system. | Swipe from the left edge to go back in supported apps and menus. |
| Multitasking | Tap or swipe the Recent Apps button to view running apps. | Swipe up and hold to open the App Switcher, or swipe along the bottom edge to switch between recent apps. |
| Speed | Quick for users familiar with button navigation but requires visible navigation controls. | Fast, fluid, and intuitive once learned, with fewer taps and more natural swipe actions. |
| Learning Curve | Easier for first-time smartphone users because the buttons are always visible. | Requires a short adjustment period, especially for users moving from button-based Android phones. |
| Customization | Many Android devices let users switch between buttons and gesture navigation or customize button layouts. | Core navigation gestures cannot be changed, but Accessibility features like AssistiveTouch and Back Tap offer additional customization. |
Which Navigation System Is Better?
There isn’t a universal winner—it depends on your preferences.
Choose Android Navigation Buttons if you:
- Prefer visible navigation controls.
- Want a dedicated Back button that works system-wide.
- Like having more customization options.
Choose iPhone Gestures if you:
- Want a cleaner, full-screen experience.
- Prefer smooth, natural swipe navigation.
- Frequently multitask and switch between apps.
- Enjoy consistent gestures across Apple’s ecosystem.
For most users, iPhone gestures become second nature after a few days of use. Once you’re comfortable with the swipe-based interface, you’ll likely find it faster and more efficient than traditional navigation buttons, especially when multitasking or using one hand.
Complete iPhone Gestures List
| Gesture | Action | Supported iOS |
|---|---|---|
| Swipe Up | Home | All |
| Swipe Down | Search | All |
| Pinch | Zoom | All |
| Three Finger Pinch | Copy | iOS 13+ |
| Three Finger Spread | Paste | iOS 13+ |
| Swipe Left | Back | All |
| Back Tap | Shortcut | iOS 14+ |
| FaceTime Heart | Reaction | iOS 17+ |
| Camera Pinch | Zoom | All |
Best Hidden iPhone Gestures Every User Should Try
Most iPhone users know the basic swipe and tap gestures, but Apple has packed iOS with dozens of hidden iPhone gestures every user should know. These lesser-known tricks can save time, improve productivity, and make navigating your iPhone much easier. Whether you’re using iOS 17, iOS 18, or a newer version, the following countdown features some of the best hidden gestures that every iPhone owner should master.
15 Most Unknown Gesture – Drag Multiple Items at Once
Did you know you can move multiple photos, files, or emails at the same time? Touch and hold one item, then use another finger to tap additional items. Once they’re grouped together, drag and drop them into another folder or app. This gesture is perfect for organizing photos, Notes, or Files without repeating the same action multiple times.
14 Secret Keyboard Trick – Turn the Keyboard into a Trackpad
Instead of struggling to place the text cursor accurately, press and hold the Space bar until the keyboard turns into a virtual trackpad. Slide your finger to move the cursor anywhere in the text, making editing documents, emails, and messages much easier.
13 Camera Swipe – Switch Camera Modes Instantly
While using the Camera app, simply swipe left or right across the camera mode bar to switch between Photo, Video, Portrait, Cinematic, Pano, or Slow-Mo. This quick gesture helps you capture the perfect shot without searching through menus.
12 Safari Shortcut – Swipe Between Open Tabs
If you often browse with multiple tabs open, swipe left or right across the Safari address bar or bottom tab bar to instantly switch between tabs. This is much faster than opening the tab overview every time you want to change websites.
11 FaceTime Reaction – Trigger Animated Effects with Hand Gestures
During FaceTime or supported video calls, use hand gestures like 👍, ❤️, ✌️, or 🤟 to automatically trigger animated reactions such as balloons, hearts, confetti, fireworks, rain, and laser effects. These fun gestures make video calls more interactive.
10 Back Tap Shortcut – Double-Tap the Back of Your iPhone
Enable Back Tap in Settings > Accessibility > Touch > Back Tap to perform actions by double- or triple-tapping the back of your iPhone. You can assign shortcuts like taking screenshots, launching the Camera, turning on the flashlight, opening apps, or running Siri Shortcuts.
9 Three-Finger Copy and Paste
Instead of using the edit menu, pinch inward with three fingers to copy selected text and pinch outward with three fingers to paste it. These hidden gestures make editing documents much faster.
8 Swipe Along the Bottom Edge to Switch Apps
Need to jump between apps quickly? Swipe left or right along the bottom Home indicator to switch instantly between recently used apps without opening the App Switcher.
7 Long Press for Quick Actions
Many iPhone users overlook the power of a long press. Press and hold app icons, buttons, links, photos, or files to reveal quick-action menus, app shortcuts, sharing options, and additional features that aren’t visible with a normal tap.
6 Drag and Drop Across Apps
Touch and hold a photo, document, or file until it lifts, then use another finger to open a different app while continuing to hold the item. Drop it into Mail, Notes, Messages, Files, or other supported apps without copying and pasting.
5 Pull Down for Spotlight Search
From the Home Screen, swipe downward to instantly open Spotlight Search. Search for apps, contacts, emails, photos, documents, settings, calculations, conversions, and even web results—all from one place.
4 Reachability for One-Handed Use
Large iPhones can be difficult to use with one hand. Swipe down on the Home indicator to activate Reachability, which lowers the top half of the display so you can comfortably tap buttons and menus near the top of the screen.
3 Swipe to Undo and Redo
Made a typing mistake? Swipe left with three fingers to undo your last action or swipe right with three fingers to redo it. These gestures work in Notes, Pages, Mail, Messages, and many third-party apps.
2 Hidden Screenshot Shortcut – Edit and Share Instantly
After taking a screenshot, tap or long-press the thumbnail that appears in the lower-left corner. You can immediately crop, annotate, sign, share, or delete the screenshot without opening the Photos app, saving valuable time.
1 Hidden Gesture Every Power User Uses – Swipe Up and Hold for Instant Multitasking
The most valuable hidden gesture is Swipe Up and Hold. Instead of returning Home first, swipe up from the bottom of the screen and pause briefly to open the App Switcher. From there, you can instantly switch between apps, close unused apps, or continue exactly where you left off. Combined with swiping along the bottom edge to jump between recent apps, this gesture dramatically improves multitasking and is one of the biggest productivity advantages of modern iPhones.
Frequently Asked Questions (FAQs)
What are iPhone gestures?
iPhone gestures are touch-based controls that let you navigate and interact with your device using taps, swipes, pinches, long presses, and multi-finger movements instead of physical buttons. They make it faster and more intuitive to use your iPhone.
How do I use gestures on iPhone?
Simply use your fingers on the touchscreen to perform actions such as swiping up to go Home, swiping from the left edge to go back, pinching to zoom, or swiping between apps. Most gestures work automatically on Face ID iPhones without any setup.
How do I change iPhone gestures?
Core navigation gestures cannot be changed. However, you can customize gesture-related features like AssistiveTouch, Back Tap, Reachability, and other Accessibility settings by going to Settings > Accessibility.
How do I turn off iPhone gestures?
Built-in navigation gestures cannot be completely disabled. However, you can turn off optional gesture features such as AssistiveTouch, VoiceOver, Voice Control, and Back Tap from the Accessibility settings.
How do I enable swipe gestures on iPhone 13?
Swipe gestures are enabled by default on the iPhone 13. Simply swipe up to go Home, swipe up and hold to open the App Switcher, and swipe from the left edge to return to the previous screen. No additional setup is required.
Why are my iPhone gestures not working?
Gesture issues are usually caused by temporary software glitches, outdated iOS versions, screen protectors affecting touch sensitivity, accessibility settings, or touchscreen problems. Restarting your iPhone, updating iOS, cleaning the display, or resetting settings often resolves the issue.
What are FaceTime hand gestures?
FaceTime hand gestures are camera-recognized hand signs that trigger animated reactions during video calls. Gestures like 👍, ❤️, ✌️, 👎, and 🤟 can display effects such as balloons, hearts, confetti, rain, fireworks, and laser beams.
Can I customize iPhone gestures?
Yes. While the primary navigation gestures cannot be remapped, you can customize gesture-based features using AssistiveTouch, Back Tap, Touch Accommodations, and other Accessibility options to better suit your needs.
How do I turn on hand gestures on iPhone?
To use FaceTime hand gestures, make sure your iPhone supports the feature and is running a compatible version of iOS. During a FaceTime or supported video call, open Control Center, tap Video Effects, and turn Reactions on.
How do I learn all iPhone gestures?
The best way to learn iPhone gestures is by practicing them daily, exploring the Tips app, reviewing Apple’s Accessibility settings, and following a complete iPhone gestures guide like this one. With regular use, the gestures quickly become second nature.
How do I take a picture using hand gestures on iPhone?
The built-in Camera app doesn’t universally support hand-gesture shutter controls. However, some third-party camera apps, compatible accessories, or accessibility features offer gesture-based photo capture. You can also use the Apple Watch Camera Remote or voice commands for hands-free photography.
What is the Back Tap gesture on iPhone?
Back Tap is an Accessibility feature that lets you perform actions by double- or triple-tapping the back of your iPhone. You can assign actions such as taking a screenshot, opening the Camera, launching Siri, turning on the flashlight, or running Shortcuts.
Are iPhone gestures available on all models?
Most modern iPhone gestures are available on Face ID models such as the iPhone X and later. Older iPhones with a Home button support many touch gestures, but some navigation gestures and newer features like Back Tap or FaceTime Reactions may require newer hardware and recent iOS versions.
How are iPhone gestures different from Android navigation buttons?
iPhone uses a gesture-first navigation system that relies on swipes instead of on-screen buttons. Many Android devices still offer navigation buttons or allow users to choose between buttons and gestures. iPhone gestures provide a cleaner full-screen experience, while Android generally offers more navigation customization.
Which hidden iPhone gesture saves the most time?
One of the biggest time-saving gestures is Swipe Up and Hold to open the App Switcher, combined with swiping left or right along the bottom edge to switch between recent apps. Other favorites include the Space Bar trackpad, Back Tap shortcuts, three-finger copy and paste, and drag-and-drop across apps for faster multitasking.
Final Thoughts
Learning these hidden iPhone gestures every user should know will help you navigate faster, edit text more efficiently, multitask like a pro, and unlock powerful features that many iPhone owners never discover. Practice these gestures for a few days, and they’ll quickly become part of your everyday iPhone workflow.
Also Read:
Best iPhone Tips and Tricks
iPhone Hidden Features
iPhone Battery Saving Tips
iOS 18 Features Explained
iPhone Camera Tips
FaceTime Tips
Safari Tips for iPhone
Best iPhone Accessibility Features
iPhone Screenshot Guide
iPhone Privacy Settings



Rishi Sanuj is write article related to Tech and Gadget, Gaming, AI Tools, Software with 8+ years of experience covering PlayStation, and next-gen gaming trends.